Note: I am traveling this week, so I am pulling a layout idea out of my personal vault to share!
A Starburst of Creativity
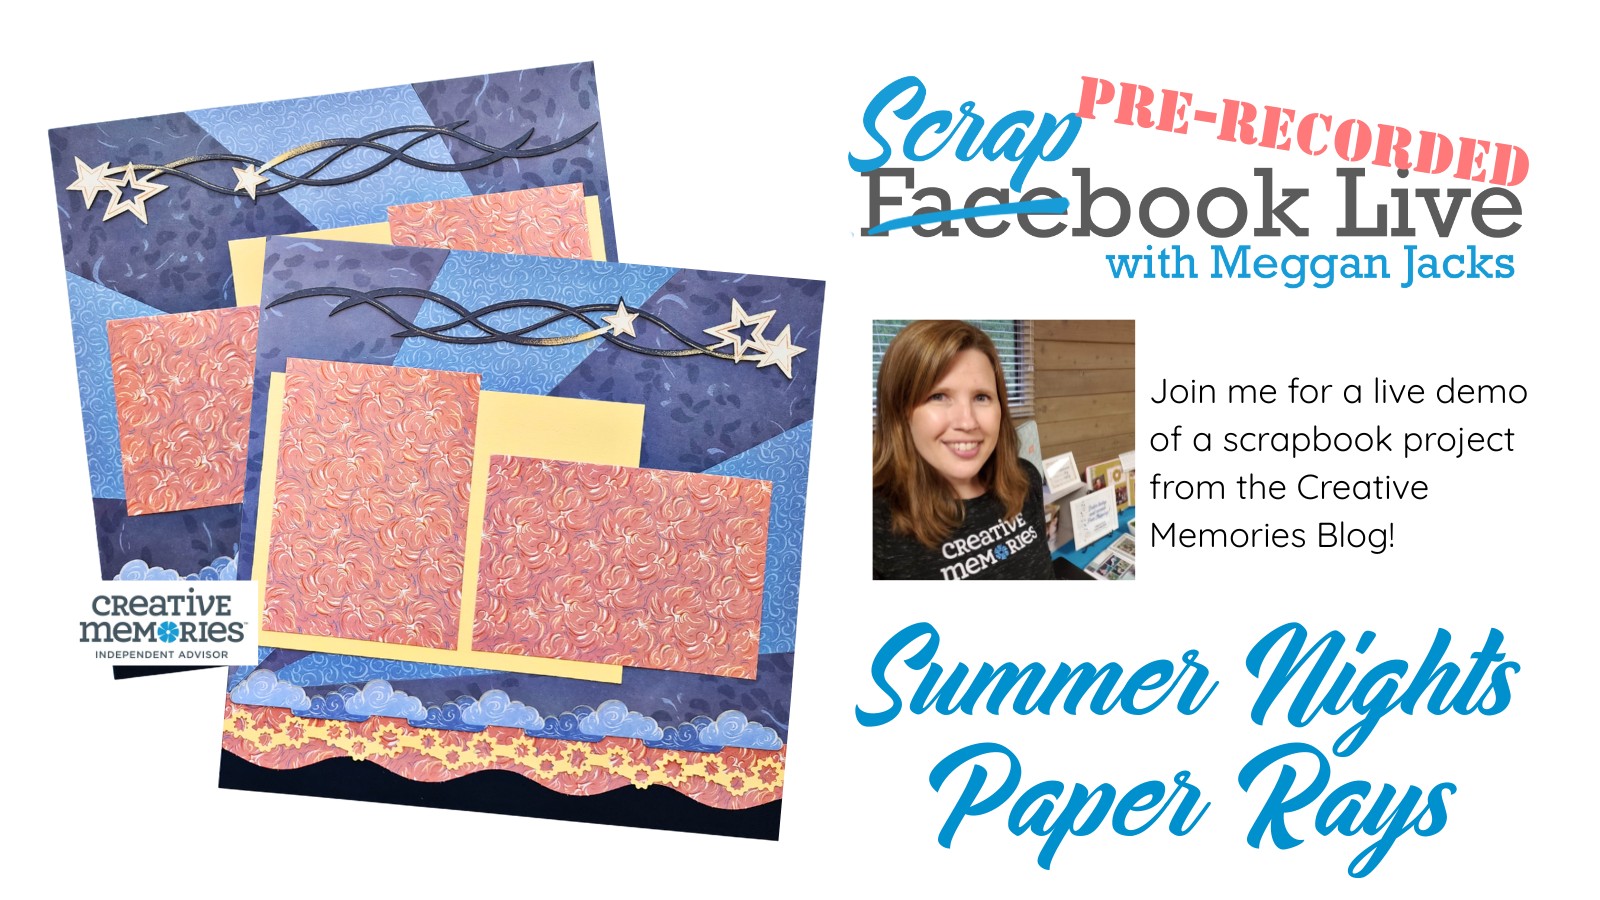
Back in 2023, I created this striking scrapbook layout with the Summer Nights Collection, which was part of Creative Memories’ Secret Box #2. While this collection has since been retired, the design itself is timeless and adaptable. The layout features paper rays radiating from the center of the page, a style sometimes called a sunburst or starburst. I prefer the term paper rays because it gives more artistic flexibility—you can decide whether your rays feel like bold beams of light or subtle bands of texture.
This design reminds me of the iconic Arizona State Flag, which of course I adore! Whether you’re highlighting summer adventures, family gatherings, or even a patriotic theme, paper rays create an instant “wow” factor.
Tools Needed
- 18″ Ruler (or other long straight edge
- Handheld Rotary Trimmer (an X-acto knife or scissors also work!)
- 12″ Decorative Trimmer (retired) (optional – sub in whatever decorative elements you want)
Choosing Papers for Your Rays
The great thing about this technique is that it works with any collection. For my sample, I went with a tonal approach —alternating the medium and dark blue papers for a moody, cohesive look. You might prefer a higher-contrast combination to add more energy to your page.
When choosing papers, consider how the patterns and solids will play against each other. Small patterns work beautifully in thin rays, while solids anchor the design and keep it from feeling too busy.
Building the Bottom Border
The bottom of the layout is designed to hold a decorative border. This is a perfect opportunity to use a pre-made border pair, or you can create a smaller accent border with cardstock and a favorite punch or border maker cartridge. Keeping the lower edge structured helps balance out the bold movement of the rays above.
Adding Photos and Extras
This layout is designed for four photos, which leaves plenty of breathing room for the paper rays to shine. If you’d like to include more pictures, Peekaboo Pockets are a fantastic solution—you’ll add more photos without covering up your creative design.
Because this layout is more advanced, I recommend following along with the video tutorial when you’re ready to cut your paper rays. The measurements matter, and the video will guide you through the process step by step.
Final Thoughts
Paper ray layouts are bold, fun, and versatile. Whether you stick with a tonal look or go high-contrast for maximum impact, this design guarantees a showstopper page. Pull out your favorite papers, line up your trimmer, and give this dynamic technique a try!