With just a little over one week until Halloween, excitement is in the air! This season is truly magical, with the vibrant Halloween hues bringing the neighborhoods to life with an array of SPOOK-tacular displays. Cody is looking forward to for trick-or-treating in our new neighborhood – we’ve been told that the treats are generous!
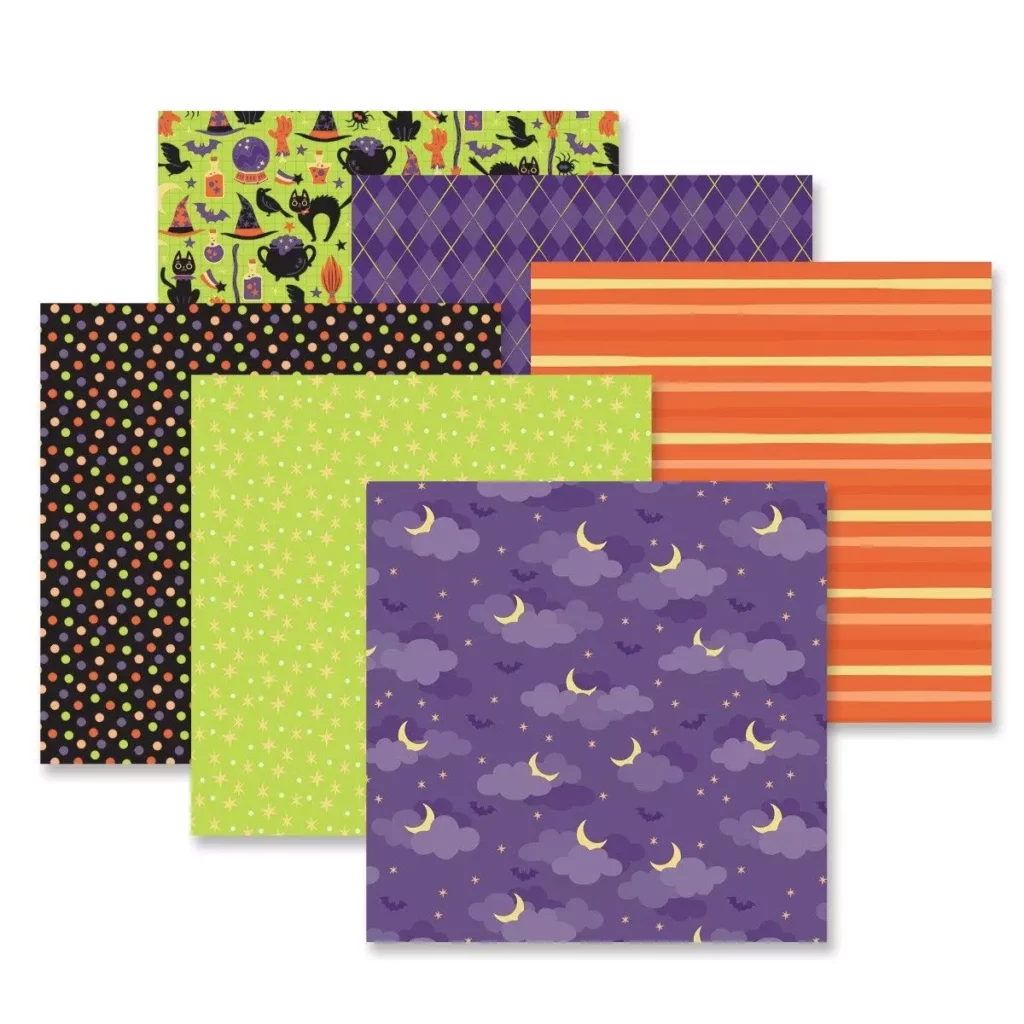
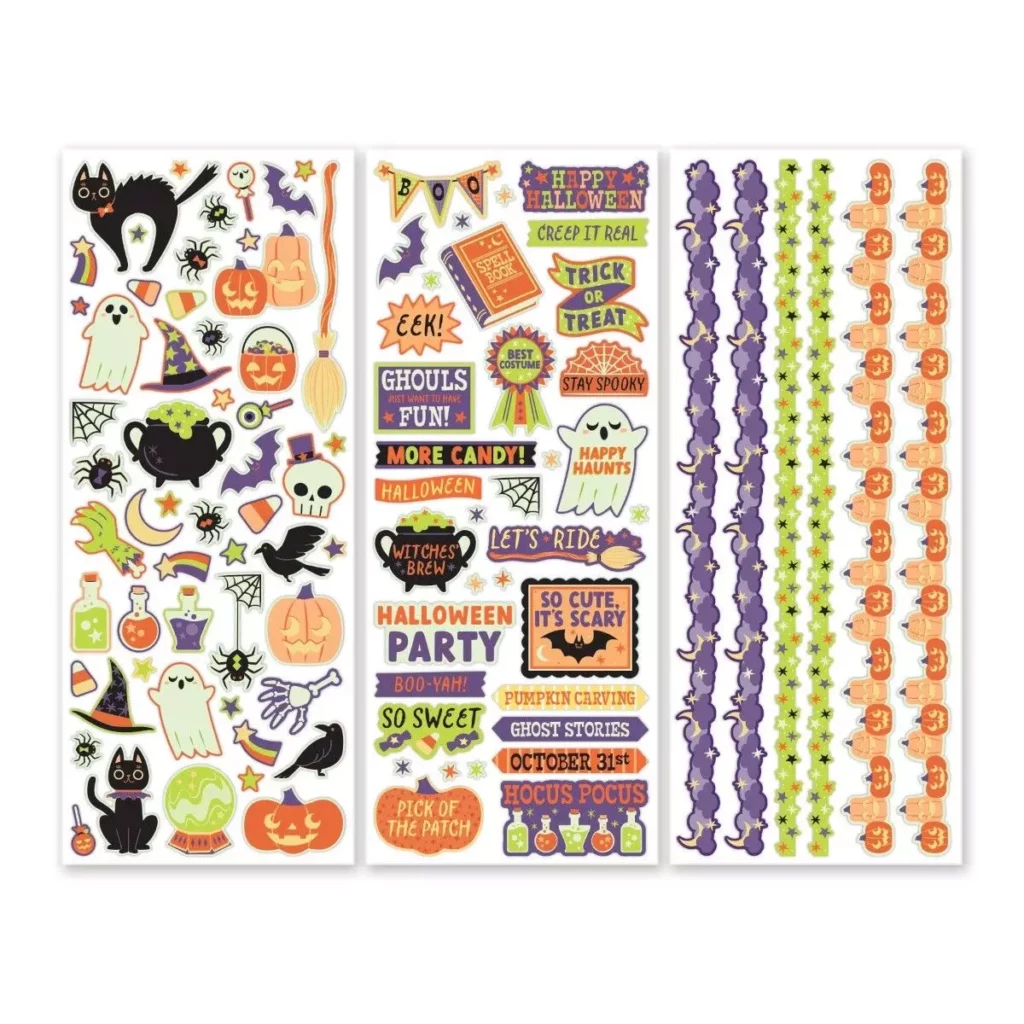
Creative Memories unveiled their new Halloween collection, Boo-Yah!, several weeks ago and it’s simply charming! The designer paper pack features a delightful mix of tonal prints and eerie patterns. You’ll find icons like pumpkin buckets, black cats, spiders, ghosts, and candy corn sprinkled throughout the papers and stickers. Plus, the stickers boast a holographic detail that adds a cool touch!
Note: This is NOT my Scrapbook Live layout for the week – this is just a fun, separate project.
Halloween Layout
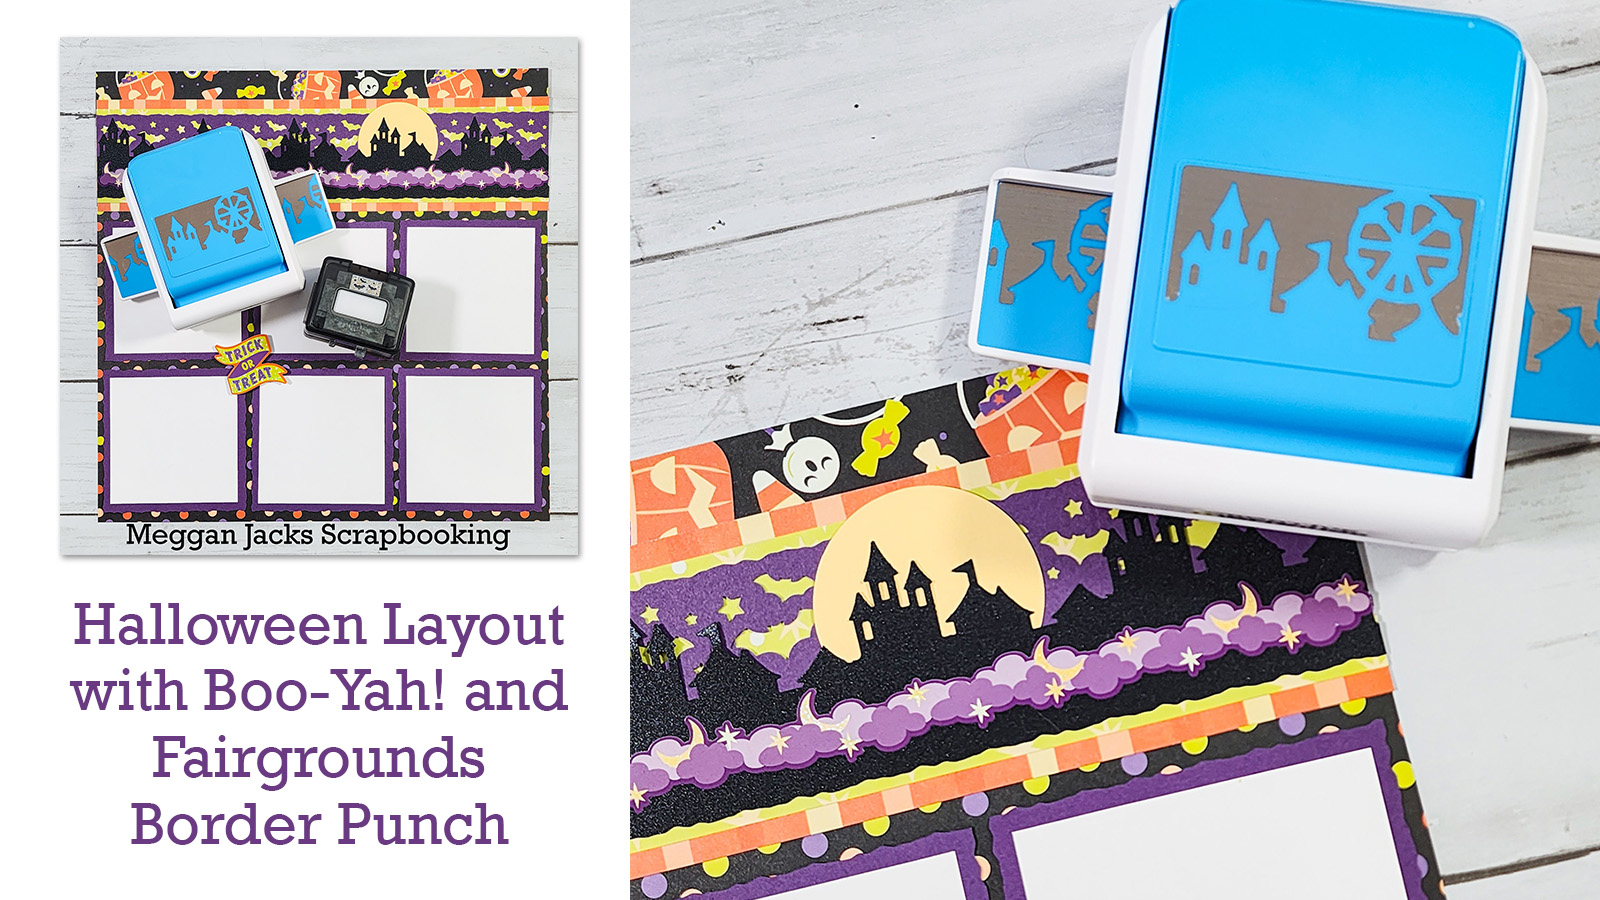
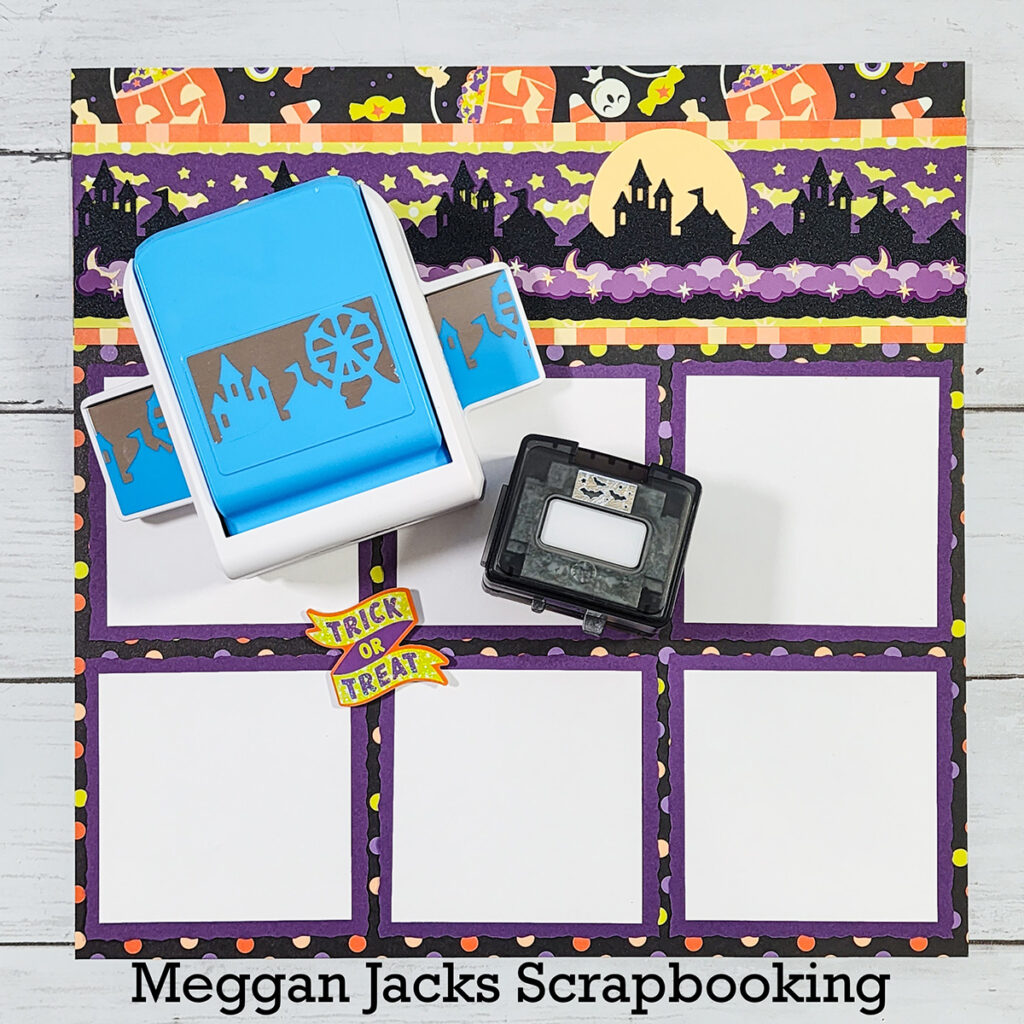
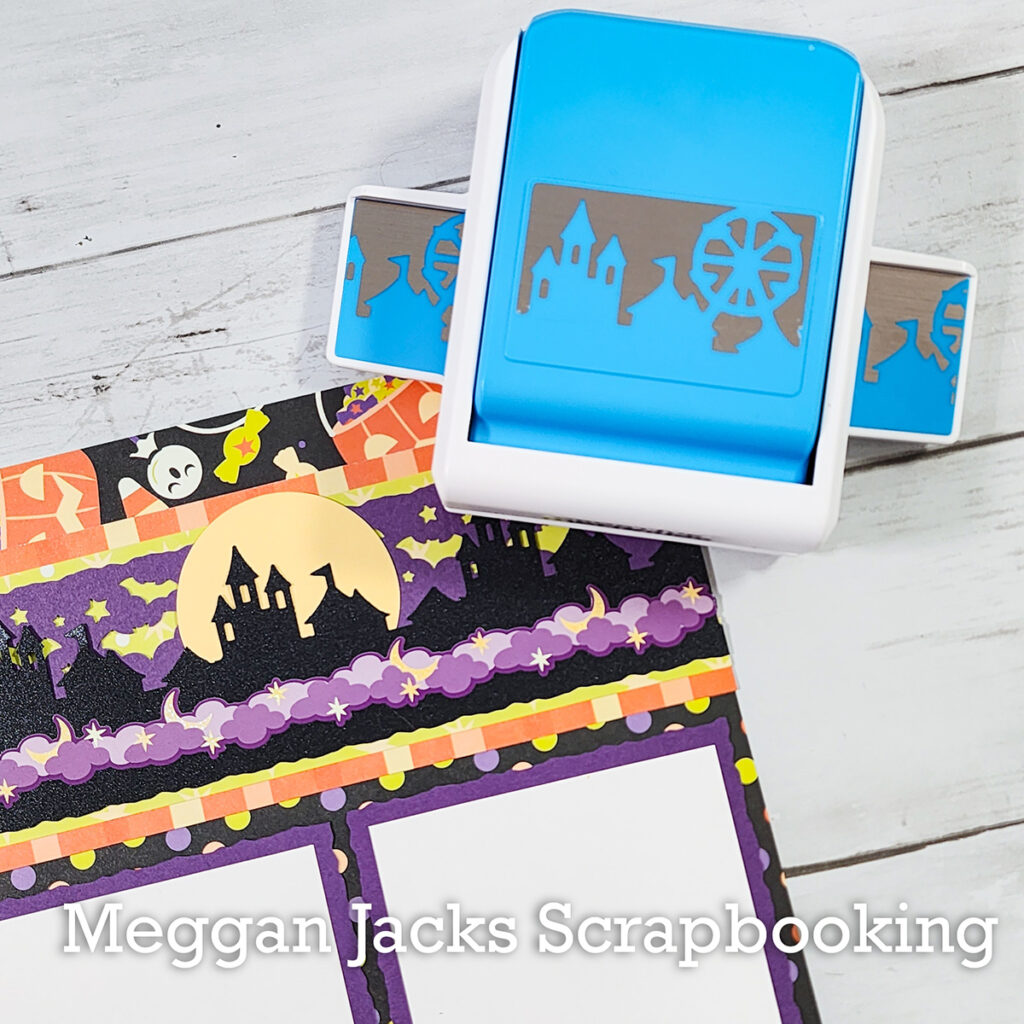
The Fairgrounds Border Punch was released a couple of years ago and when it debuted, several people quickly noted that by trimming away the Ferris Wheel and leaving behind the tents and castle, you can use the punch for things like Halloween, Fairytale and Harry Potter layouts. While the Fairgrounds Border Punch is retired from the Creative Memories website, I still have several available in my personal inventory if you need to add this punch to your collection.
I opted to use black shimmer paper to punch the Fairgrounds Border Punch as I love the sparkle that it adds to the layout. The Bats & Stars BMC punched in eggplant cardstock provides a moody sky and the lime tonal paper from the Boo Yah! paper pack provides a nice contrast to highlight the design. I use the Circle Custom Cutting System to create a moon with Canary cardstock and it’s all backed with a strip of the orange striped paper.
Directions
Spooky Castles & Bats Border
- Punch Black Shimmer Paper with the Fairgrounds Border Punch and trim at 2-1/8″ with the Deckle Blade on the 12-Inch Rotary Timmer. Use the Micro Tip Scissors to cut away the Ferris Wheels. Adhere the purple cloud border sticker as shown in the photo.
- Trim the edge of a piece of Eggplant Cardstock with the Deckle Blade on the 12-Inch Rotary Trimmer. Then punch the same edge with the Bats & Stars BMC. Trim the border to 1-1/2″ after punching. Adhere the black shimmer border to the eggplant border so that the tops of the castles are about 1/8″ from the top of the eggplant border.
- Trim a piece of Green Burst paper to 2 x 12″. Adhere the eggplant & black border, centering top to bottom.
- Trim a piece of Orange Stripes paper to 3 x 12″. Adhere the green border, centering top to bottom.
- Use Circle #2 of the Circles CCS Patterns with the Green Blade on the inside track to cut a circle from Canary Cardstock. Adhere behind the castle as shown.
Six-Image Layout
- Use the black polka dot paper as the base.
- Trim a 1 x 12″ piece of the Green Burst paper and flip it over to show the reverse side – Halloween icons on a black background. Adhere to the top of the base paper.
- Adhere the border to the background, 3/4″ from the top of the paper.
- Trim (6) 3-3/4″ square mats from Eggplant cardstock using the Deckle Blade. Adhere to layout as shown.
- Use with photos trimmed to 3-3/8″ square.
Printable Handout
Need Creative Memories Supplies?
Please consider shopping with me when you shop Creative Memories online! You can also shop my personal inventory of new and retired Creative Memories supplies (click the blue button below).