It’s taken a few months, but I finally have the Creative Memories Diagonal Plaid Border Punch in my hot little hands, and I am SO excited to play with this punch!
This standalone border punch was part of the Blue & Gold Bundle available during the 2021 Black Friday promotion. However, it was caught up in the global shipping delays, so it didn’t start shipping from CM to customers until the first week of February. But it’s definitely worth the wait.
It’s not a punch that will easily turn a corner (like a frame punch), nor will it easily go in a circle (I haven’t tried it yet, so maybe it will surprise me!) I decided that one of my first projects with it will be to make a page frame in a traditional manner – straight pieces that are mitered in the corner. Thankfully the plaid design is built on a 45°, so trimming the pieces to fit perfectly in a corner is a breeze.

Directions for the layout are below with each photo. I hope you have a chance to give it a try!
Supplies Used
- Diagonal Plaid Border Punch
- Basalt Solid Core Paper
- Bronze Shimmer Cardstock
- Kraft Photo Corners
- Blue & Gold Paper Pack (dotted grid paper)
- Blue & Gold Embellishment Pack
Directions
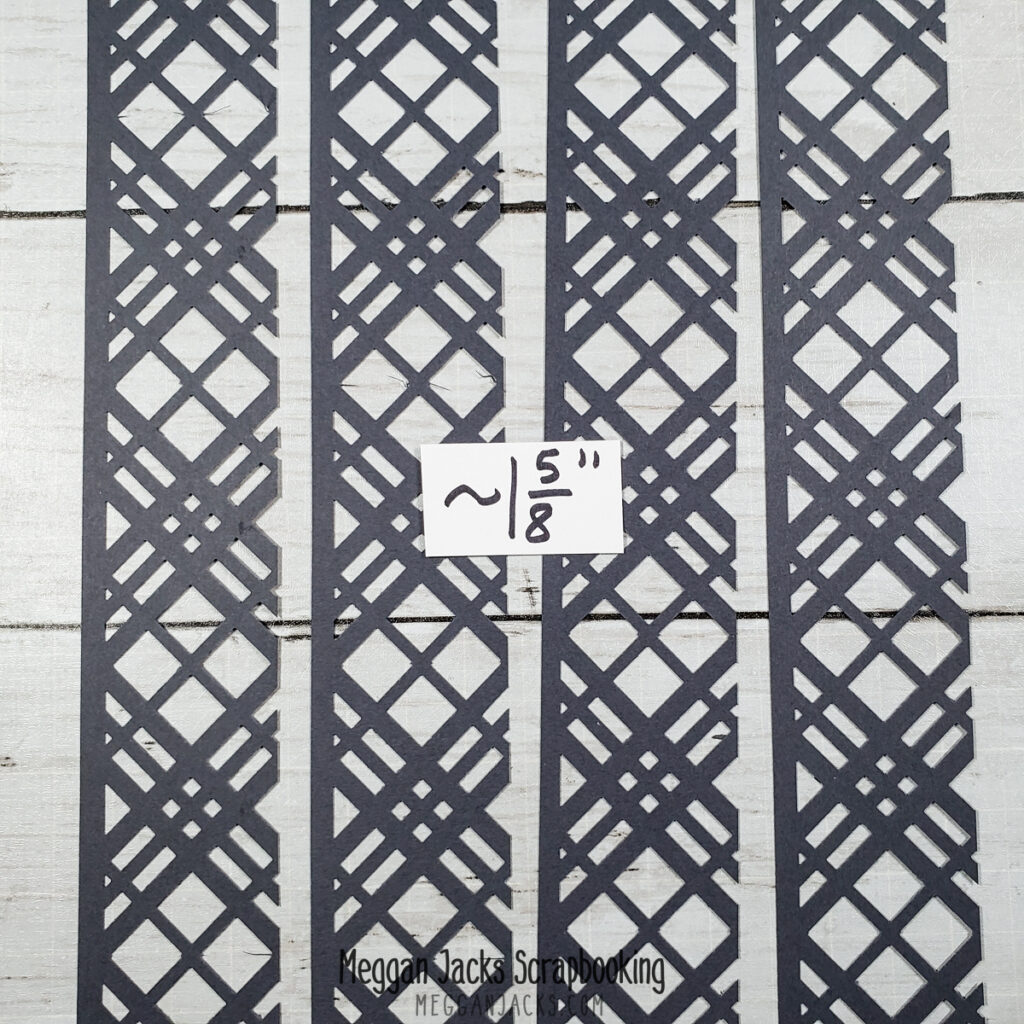
Punch (4) 12″ borders with the Diagonal Plaid Border Punch. Start each punch at the left black line on the front of the punch. Trim each border to a smidgen past 1-5/8″
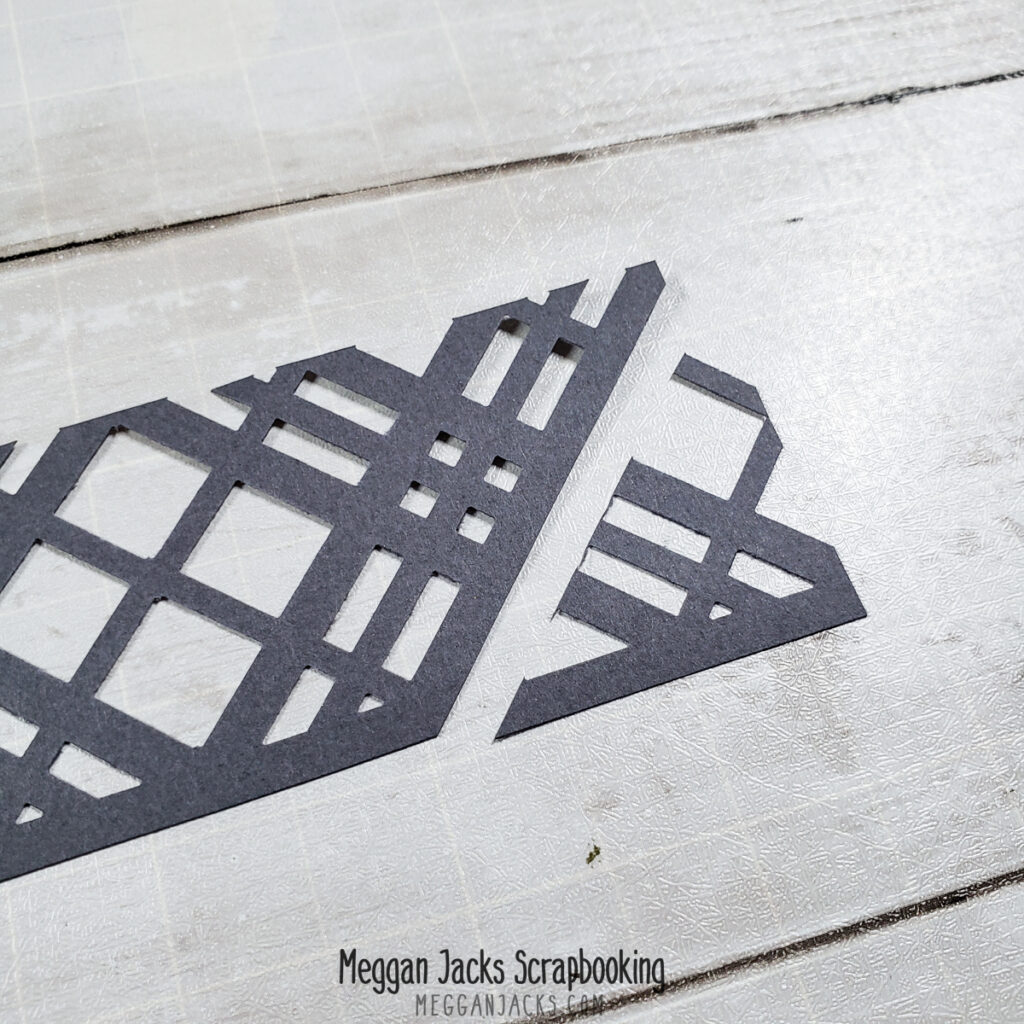
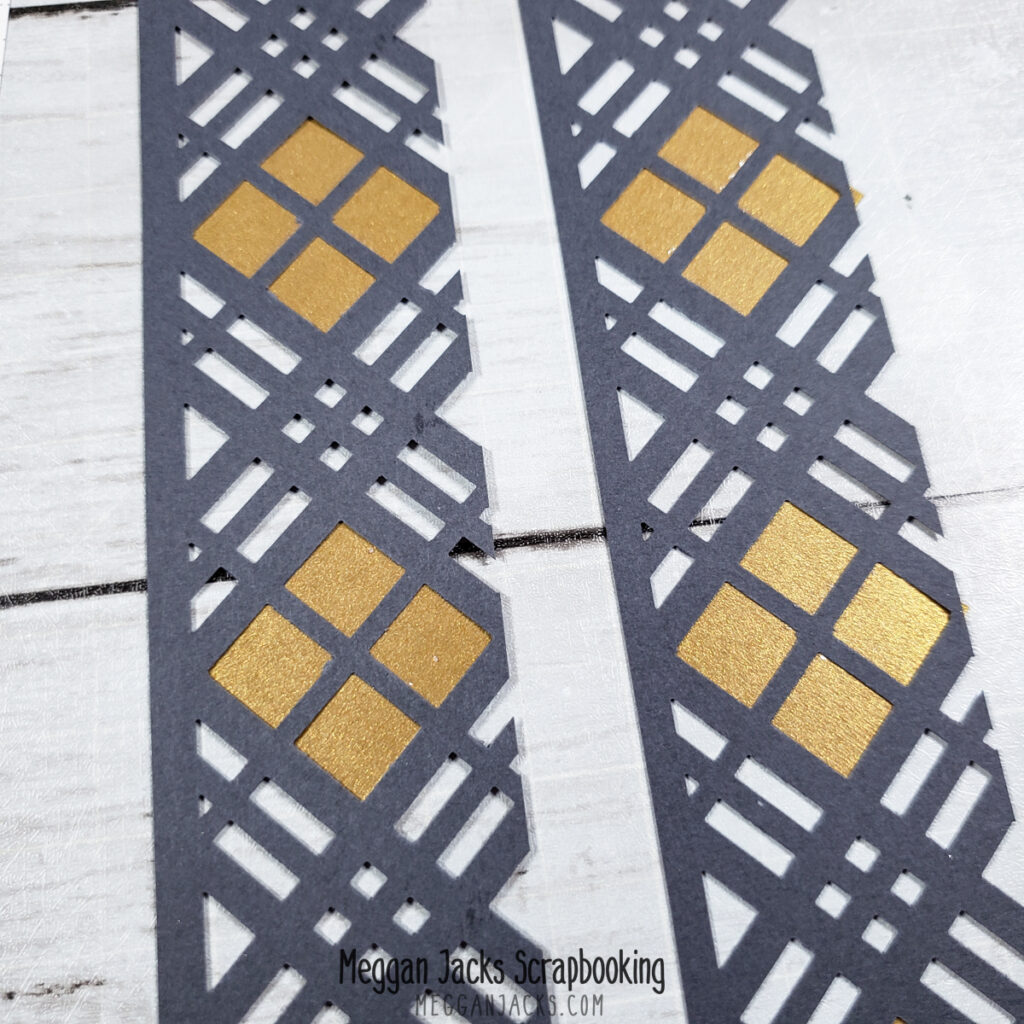
Starting at the solid edge of the border, cut off the outer corner of each strip. You will follow the outside edge of the thick diagonal line up from the solid edge to the outside corner. See photo for details.
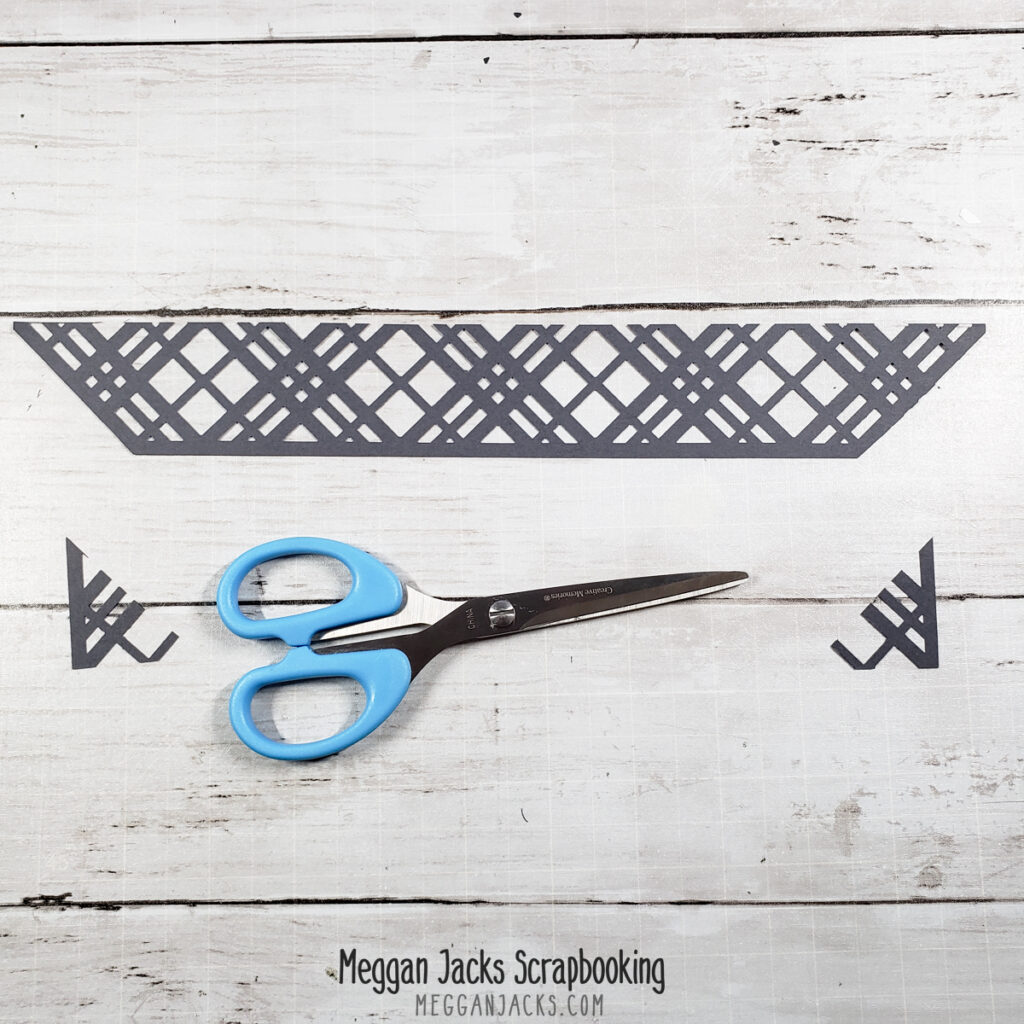
Trim off both corners so that you have a mitered border strip. Repeat on the three other borders.
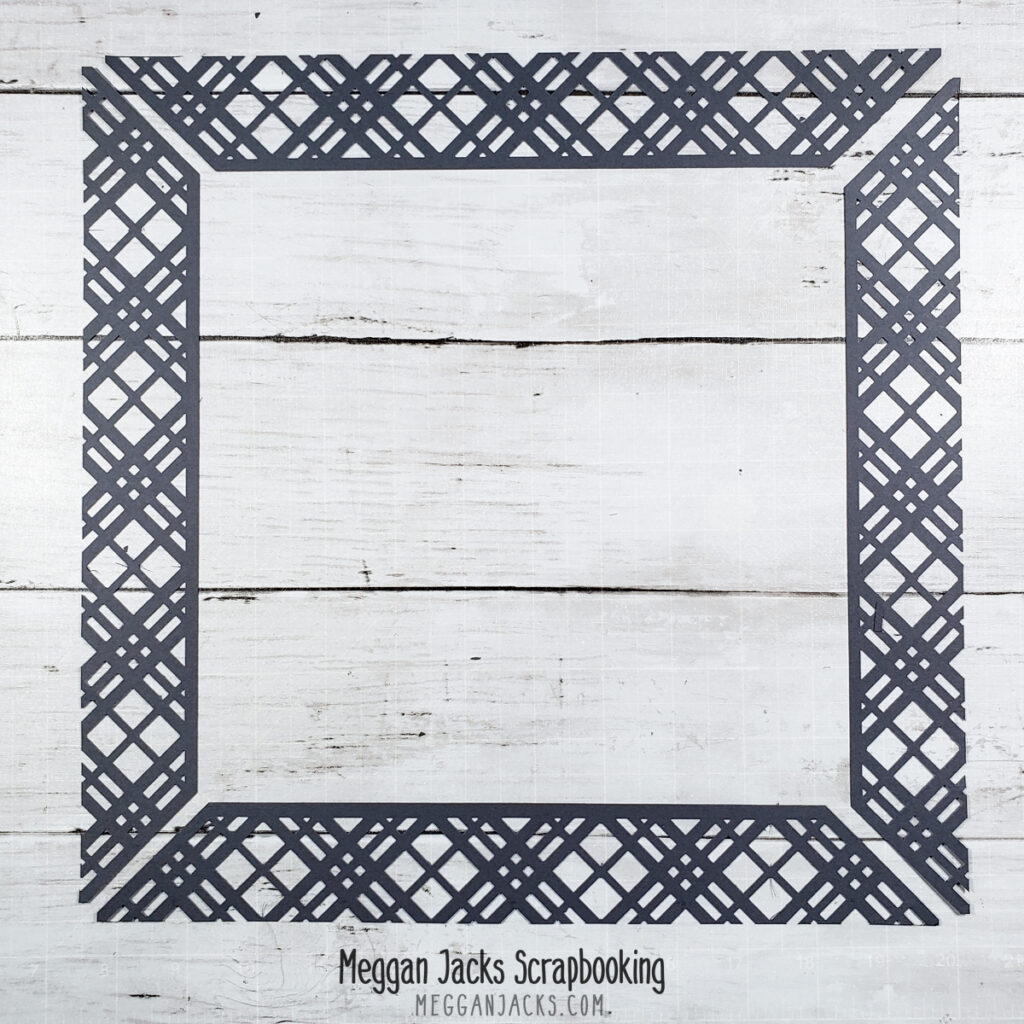
Once you have all four borders trimmed you can see the frame starting to take shape.
You can adhere the borders as is on the background paper or page. The thick diagonal edge of each corner will overlap the corner next to it. Use repositionable adhesive so that you can adjust the borders as needed.
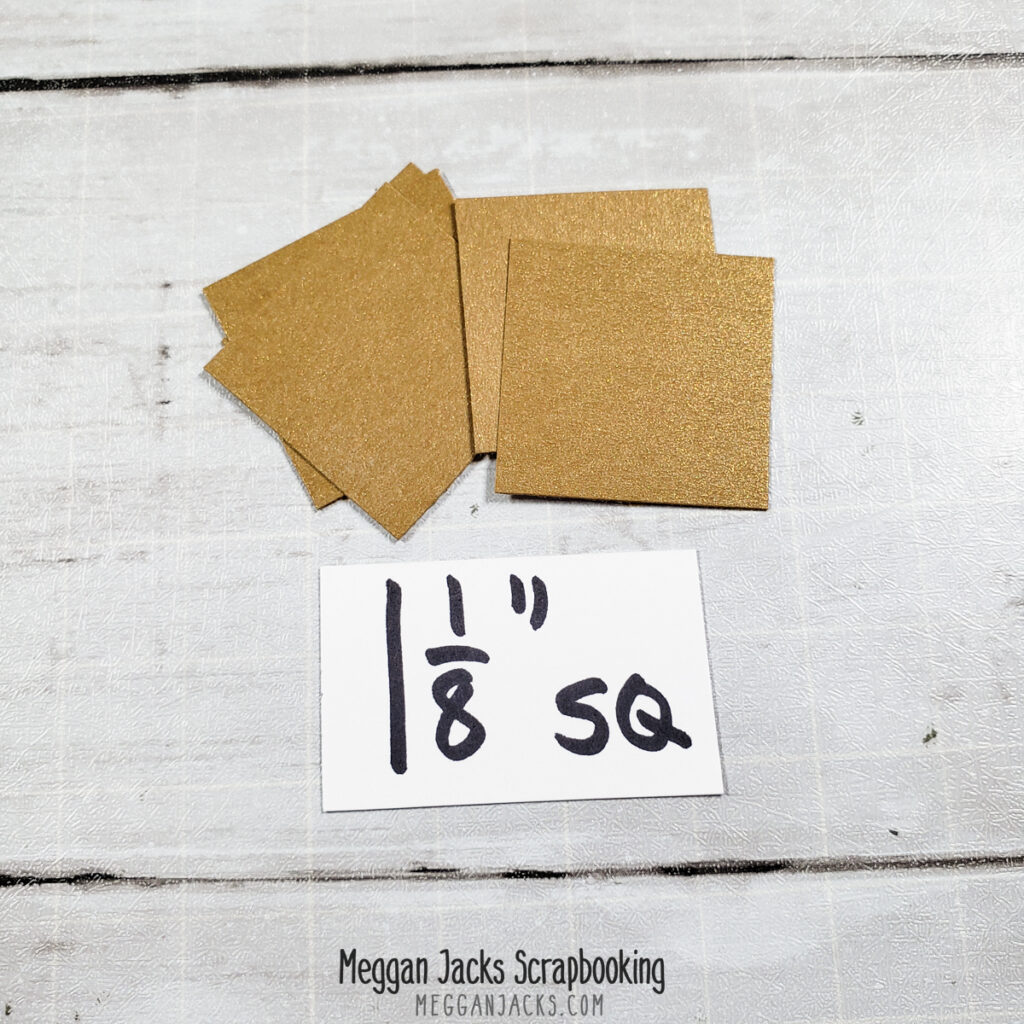
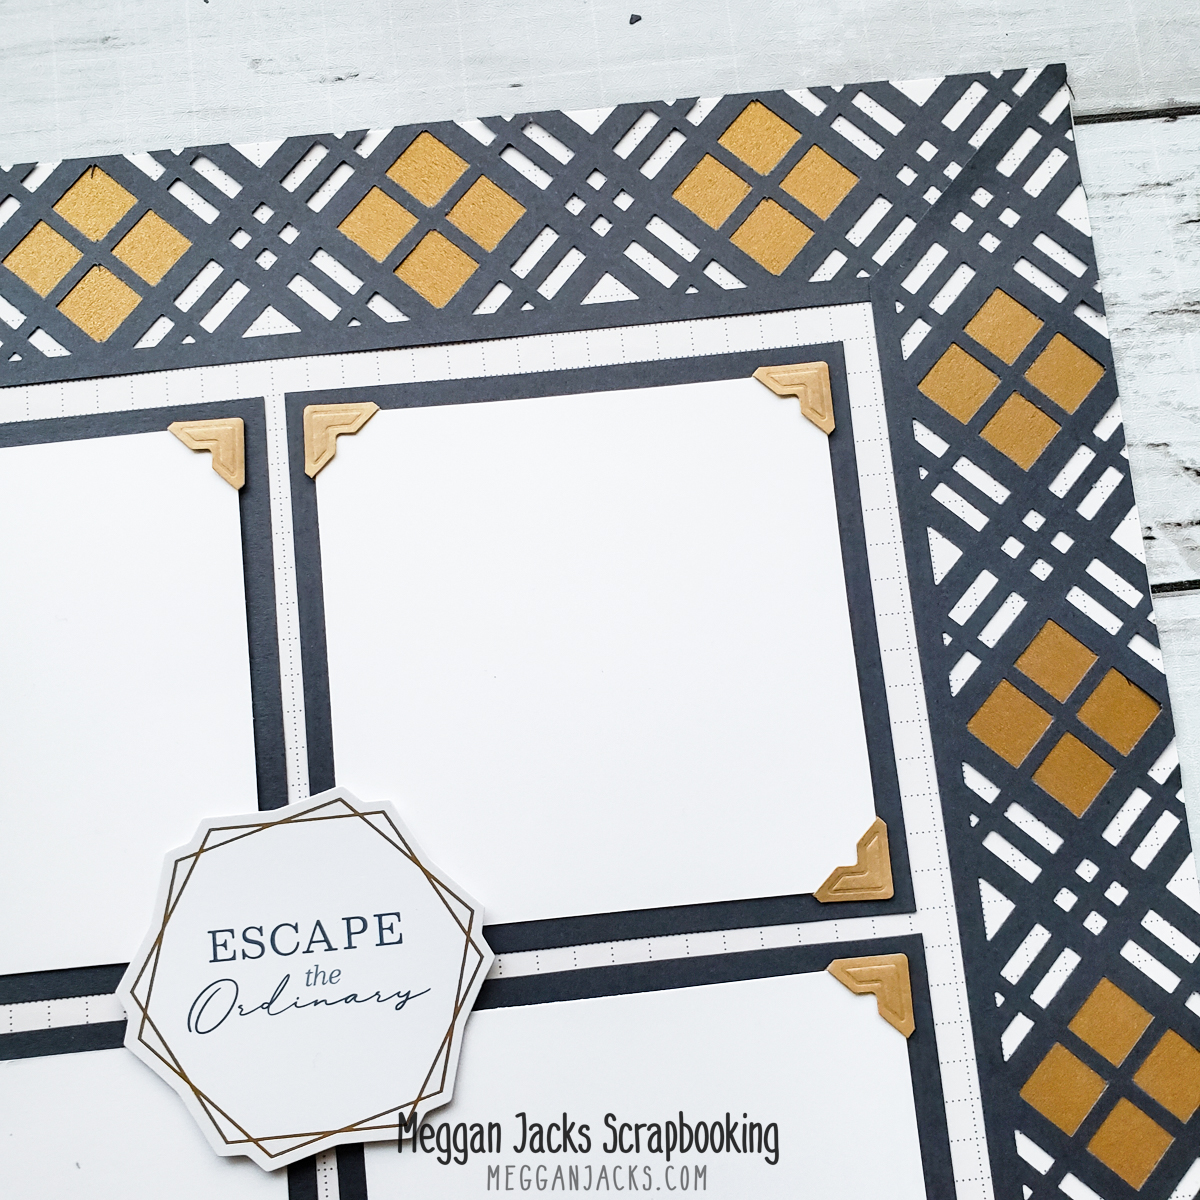
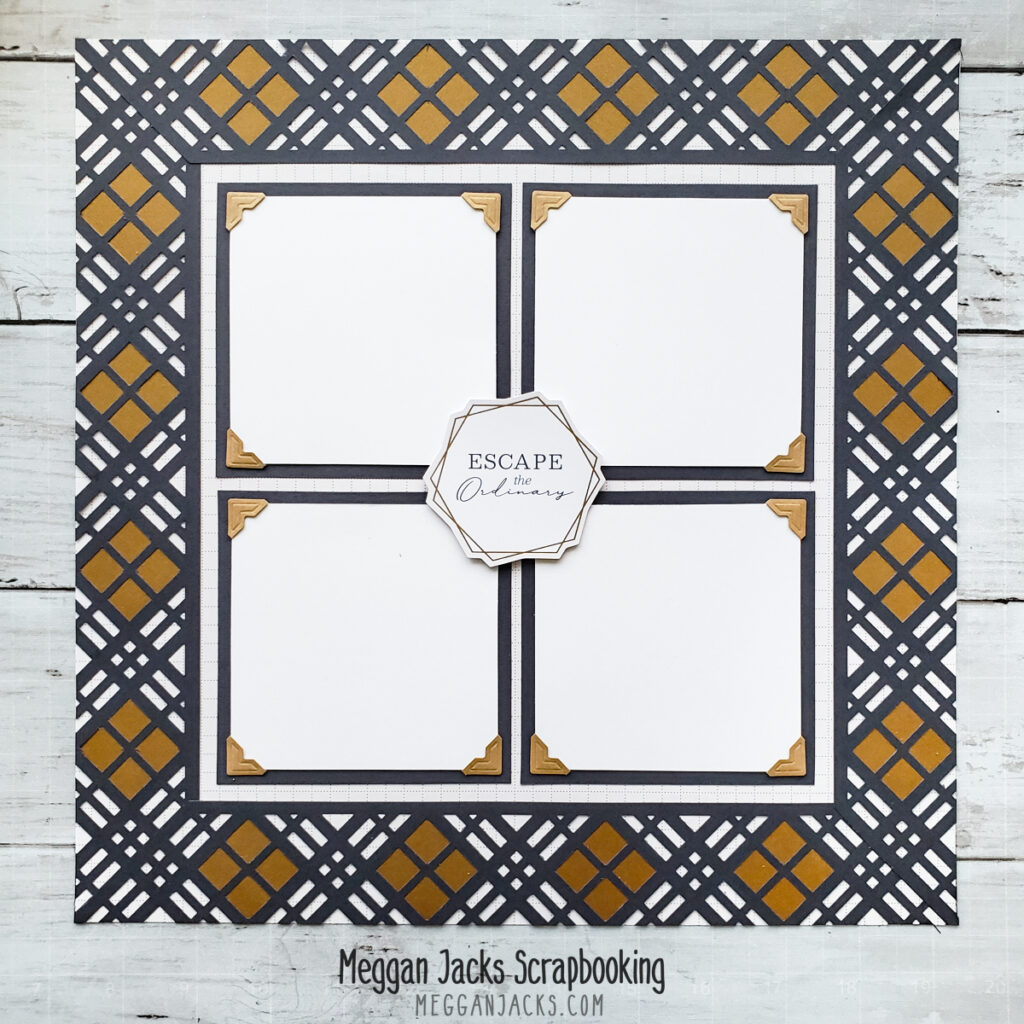
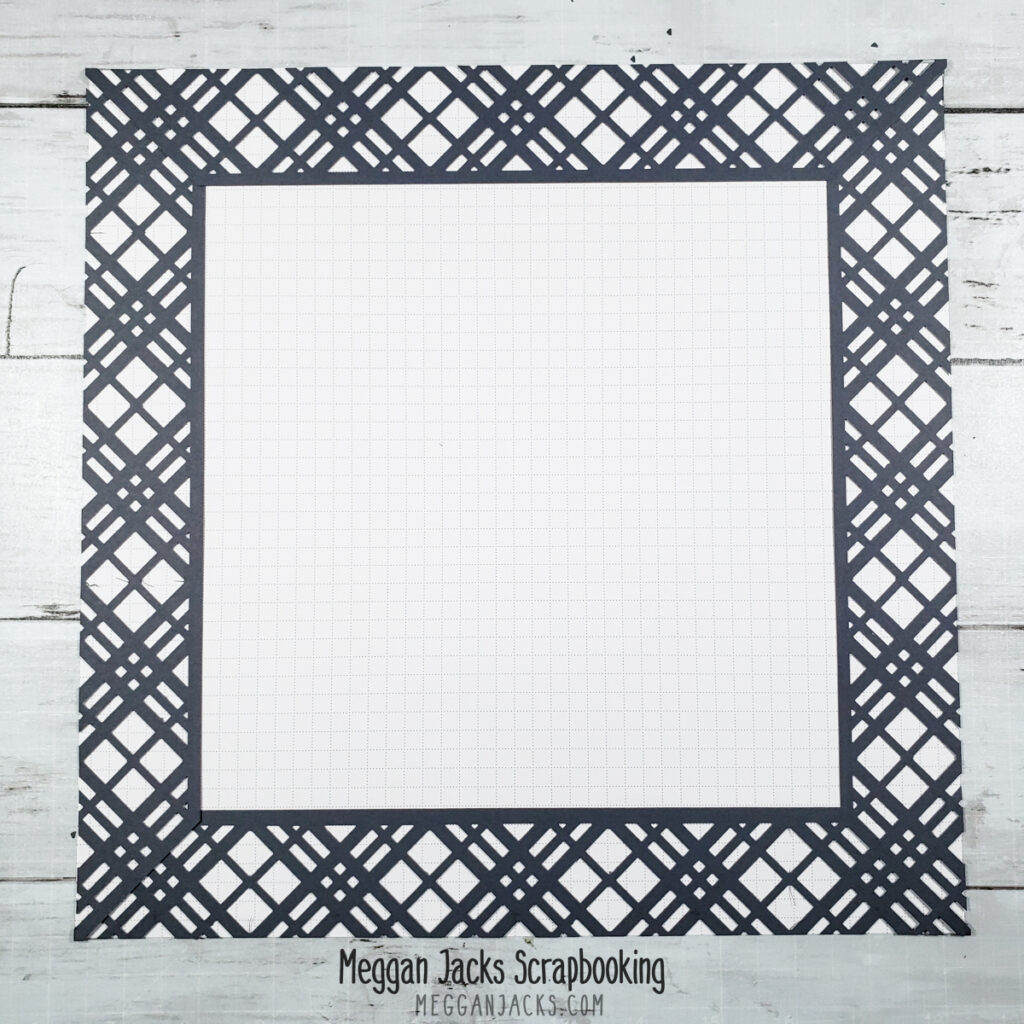
If you want to add a bit of color and interest to your border, trim (12) 1-1/8″ square pieces of paper or cardstock.
Adhere behind the squares of the border as shown. You will use three squares per border.
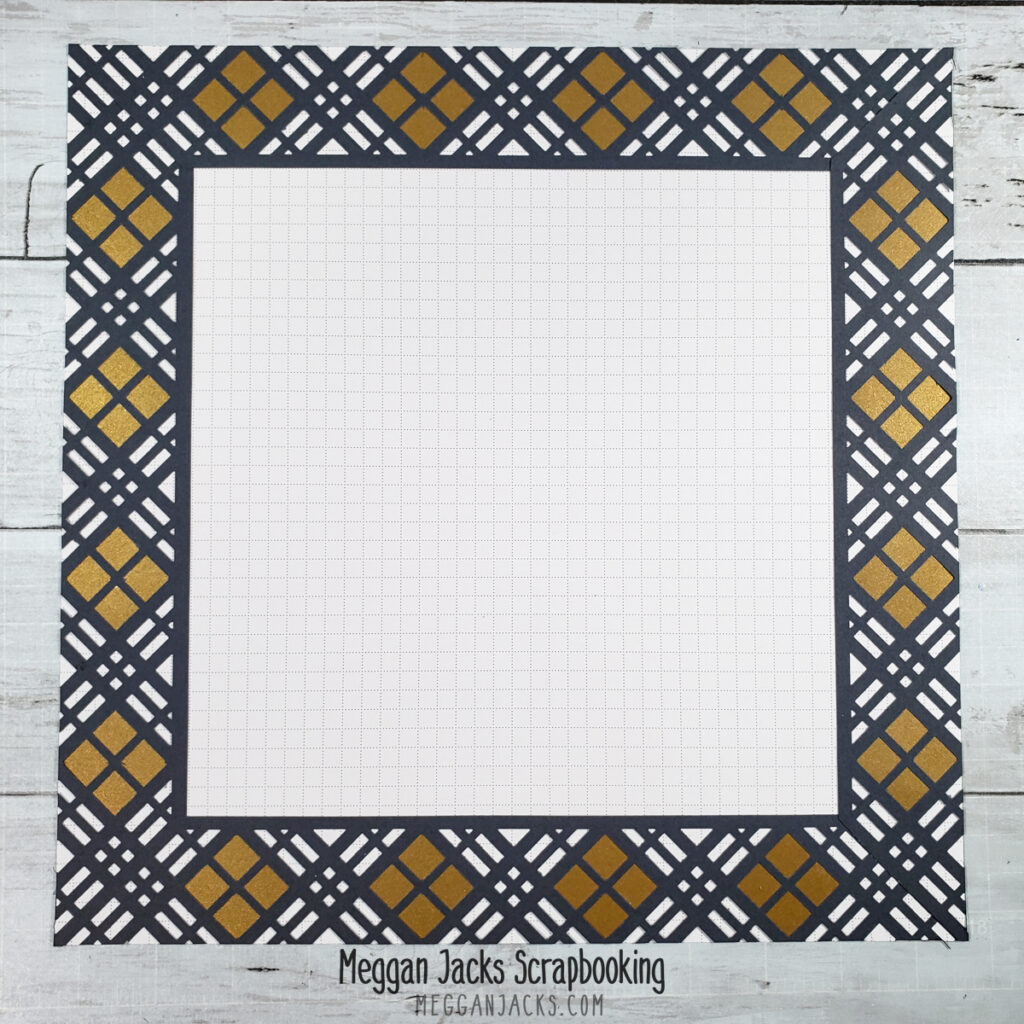
Gorgeous!
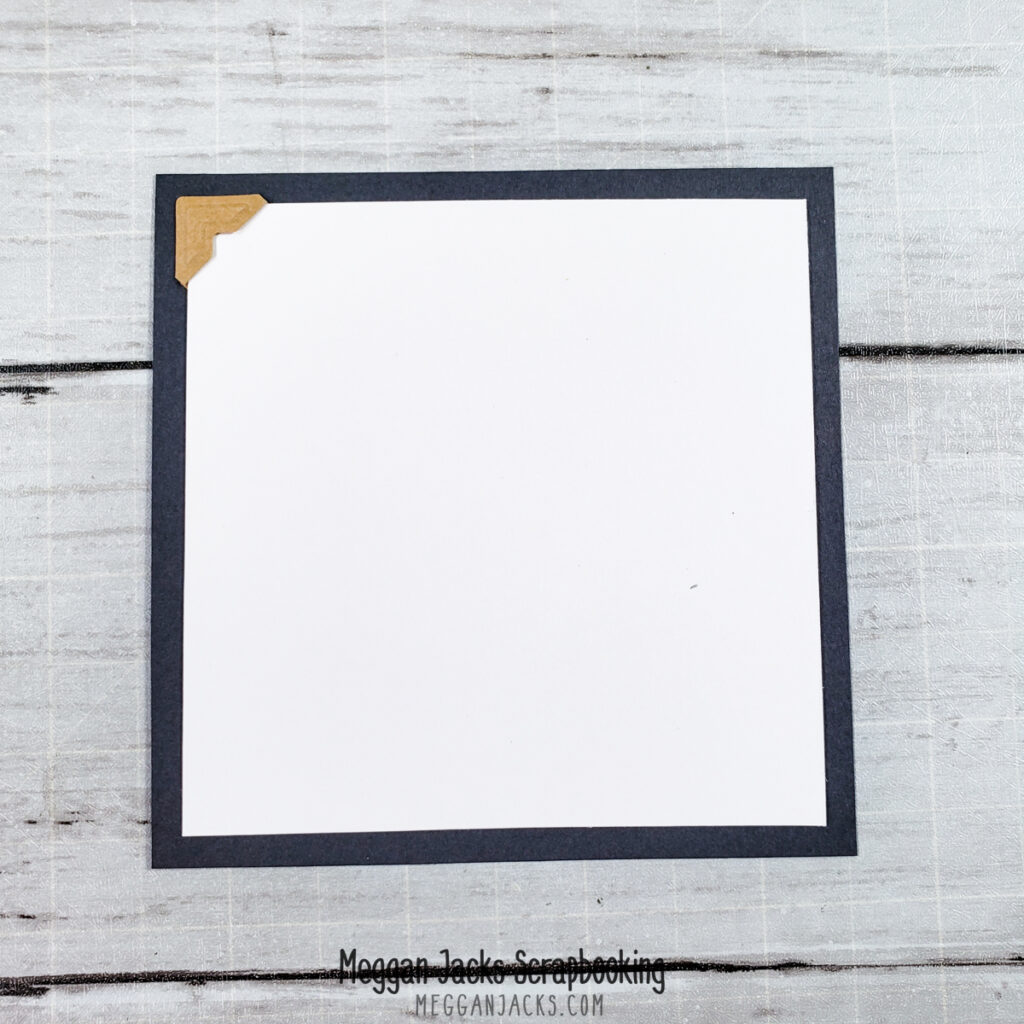
The sample layout shows 3-5/8″ square photos mounted on 4″ mats. The Kraft Photo Corners look fantastic with the Bronze Shimmer Paper! If you use the photo corners, I recommend using regular adhesive in the center of your photo and adhering the photo to the mat first. Then slide on the photo corners.
The Diagonal Plaid Border Punch, Basalt Solid Core Paper and Bronze Shimmer Paper combine to make a truly elegant scrapbook page all set for four of your favorite photos. This would look exceptional with black and white heritage photos!
If you create this layout, be sure to share it with me in my Facebook Group.
Need Supplies?
Please be sure to support a Creative Memories advisor when you shop from the Creative Memories website. If you are not currently working with an advisor, please consider shopping with me!

Thanks for, as usual, simplifying the use of CM punches/borders