Update: Creative Memories retired the Decorative Trimmer in fall 2024. But I know there are crafters out there with this classic Creative Memories tool in their stash!
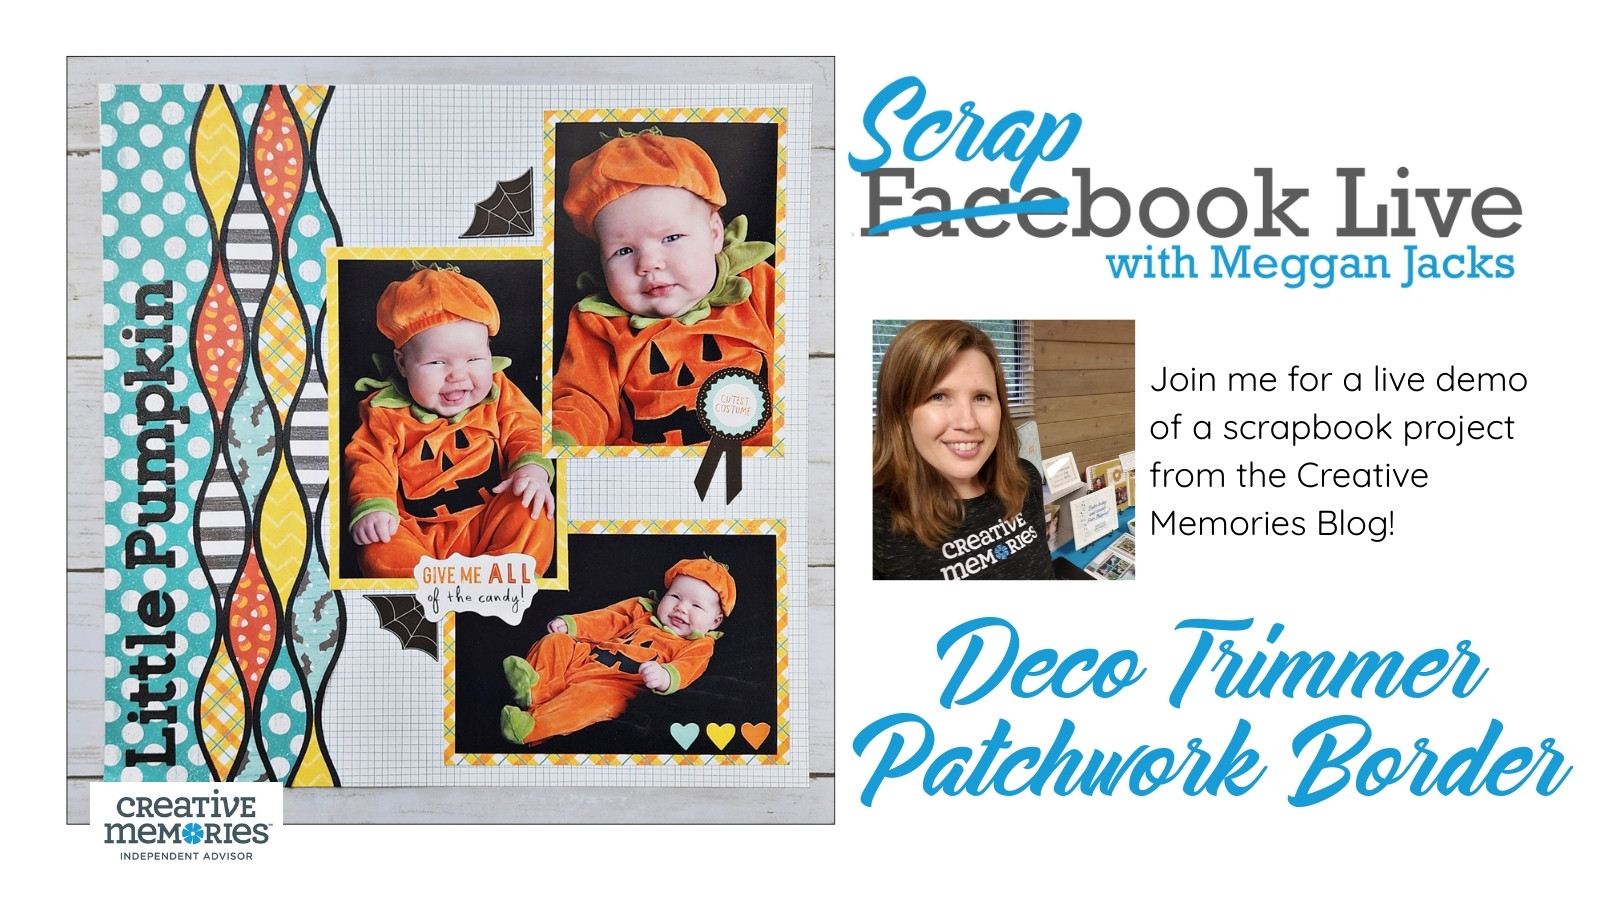
When this layout first appeared in the marketing materials for the 2023 Painted Garden collection, I knew right away it would be a MUST-DO for Scrapbook Live. The design was originally created by CM Blog Designer Krislyn Mattei, and it definitely has the WOW factor!
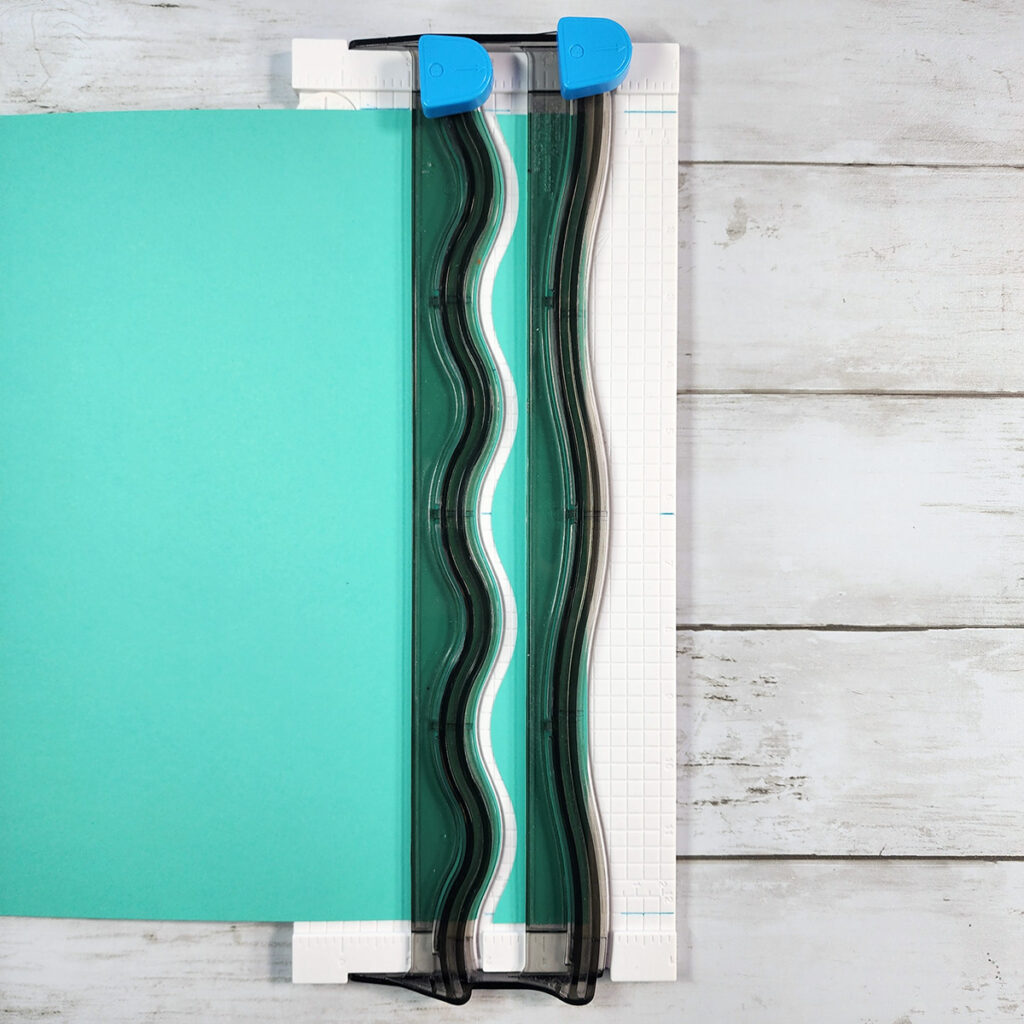
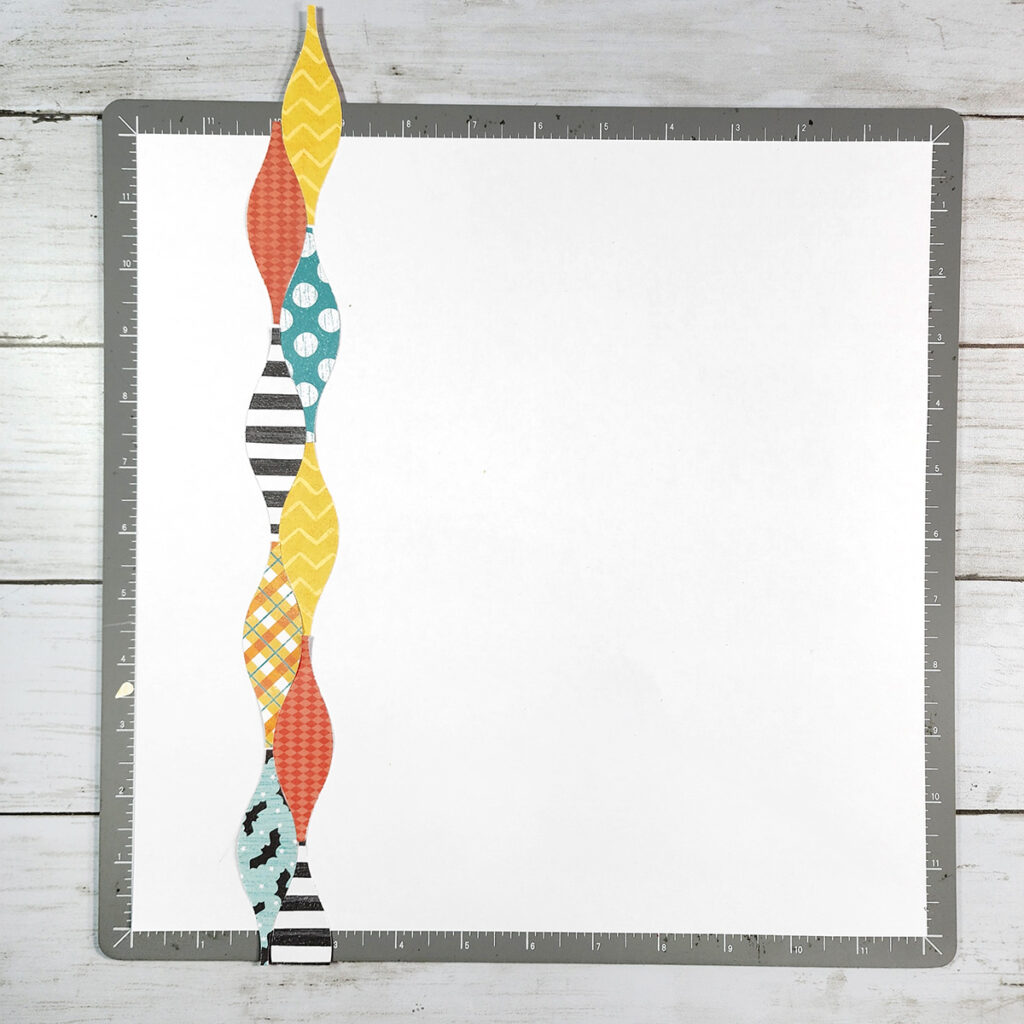
I’ve always loved the 12-Inch Decorative Trimmer, and any chance I get to play with it makes for a good day of scrapbooking. This layout is what I call a technique layout—it’s less about the theme of the collection and more about experimenting with a creative way to use your tools and scraps.
For my version, I pulled out photos from Halloween 2006 (!) and paired them with the retired Wickedly Cute papers. The playful patterns and colors were just right for capturing the fun vibe of a baby’s first Halloween. ?
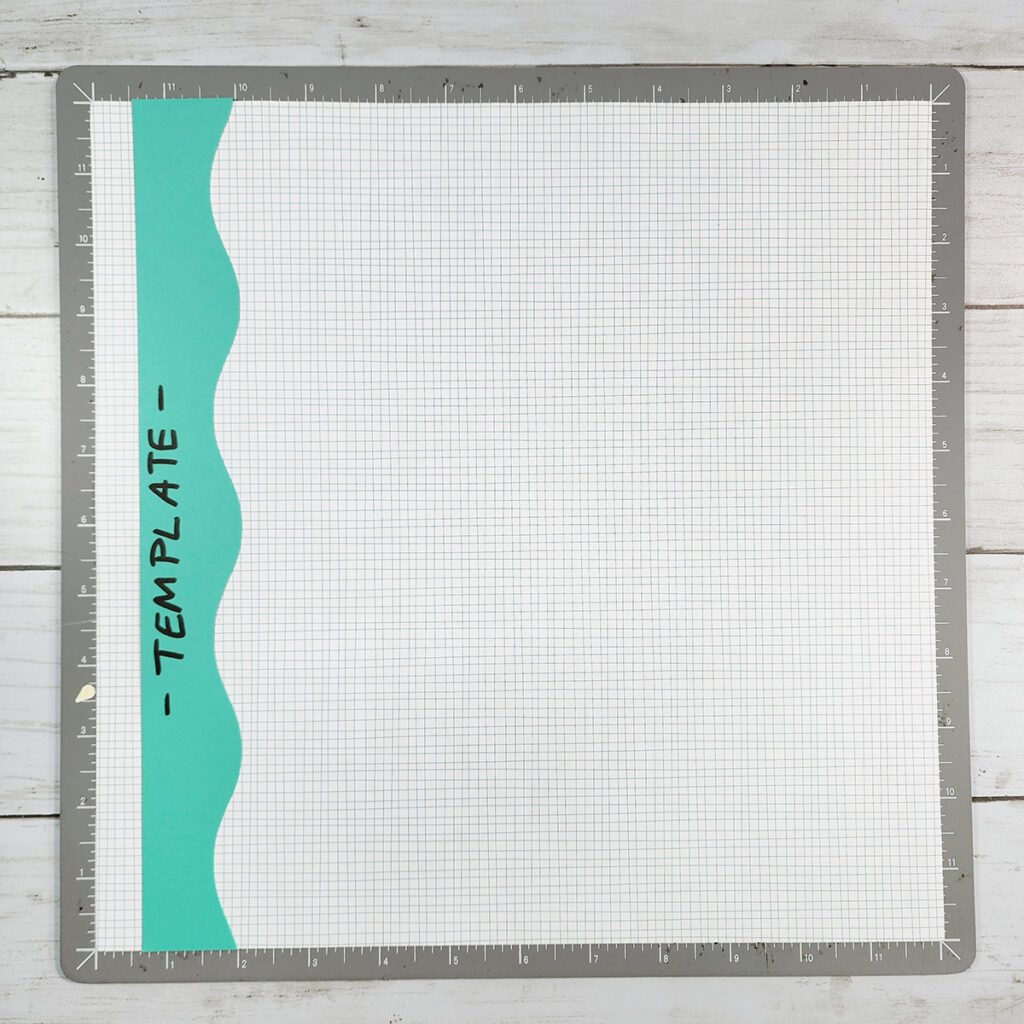
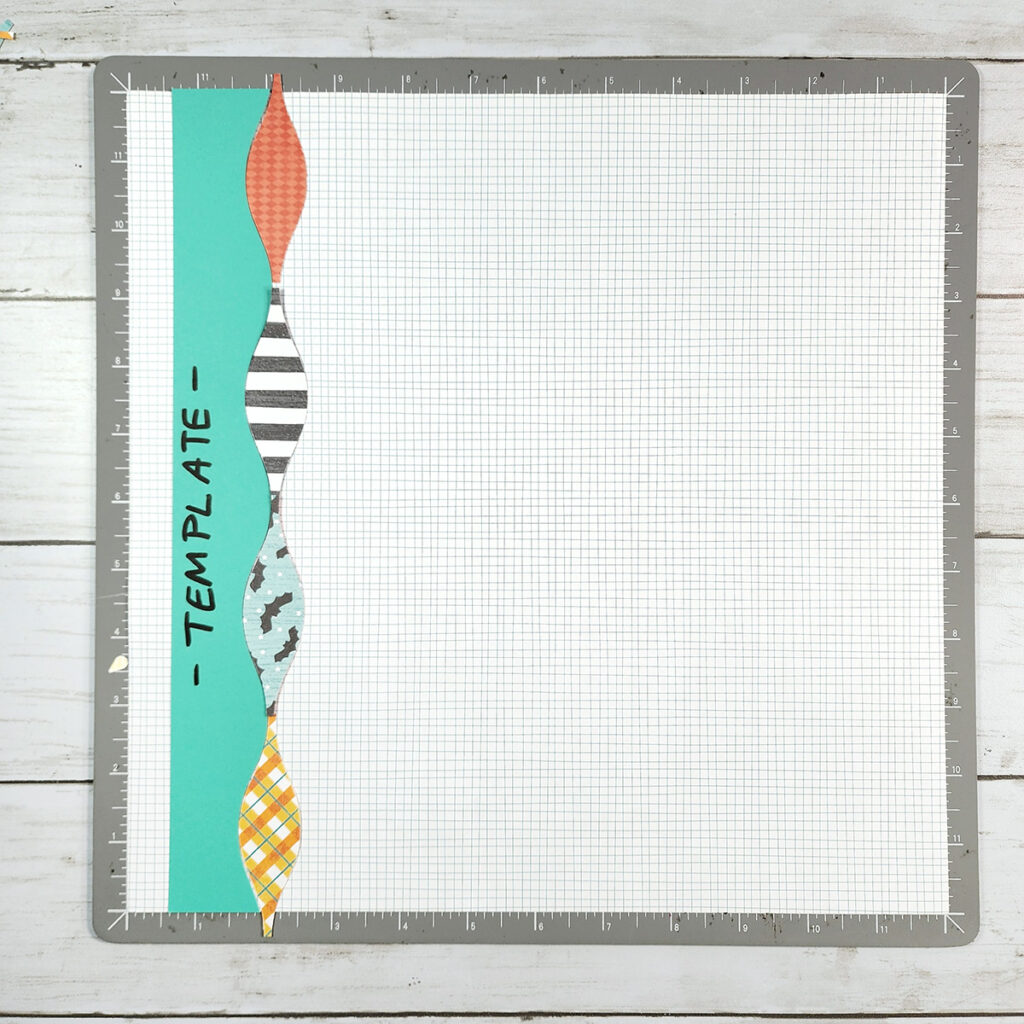
If you’d like an easier way to align all of the Decorative Trimmer patchwork pieces, keep reading to the end. I’ve included an alternative method using a cardstock template that helps you line everything up quickly and accurately. It’s a simple trick that makes this WOW-worthy page achievable for scrapbookers at every skill level.
? Whether you’re using Painted Garden, Wickedly Cute, or any other collection, the Deco Trimmer Patchwork Border is a versatile design you’ll want to try. Don’t forget to scroll down for the handout and the cardstock template tip!

Alternative Method with a Cardstock Template
At the very end of the Live Video, I reference the option to create/use a template cut from cardstock. Below are some photos with more details on how you would do that.
Then Handout – Decorative Trimmer Patchwork Border Layout
Need Creative Memories Supplies?
Please be sure to support a Creative Memories advisor when you shop from the Creative Memories website. If you are not currently working with an advisor, please consider shopping with me! 🙂